Produk Oorsig
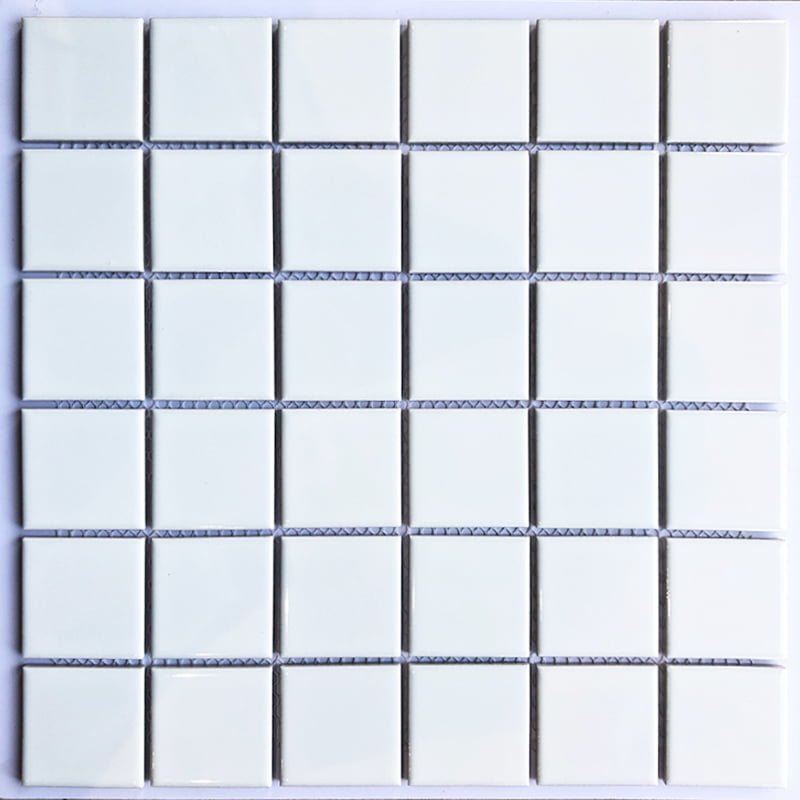
item:Heksagoon mosaïekteëls - Wit Swart Keramiek Mosaic
Materiaal: keramiek
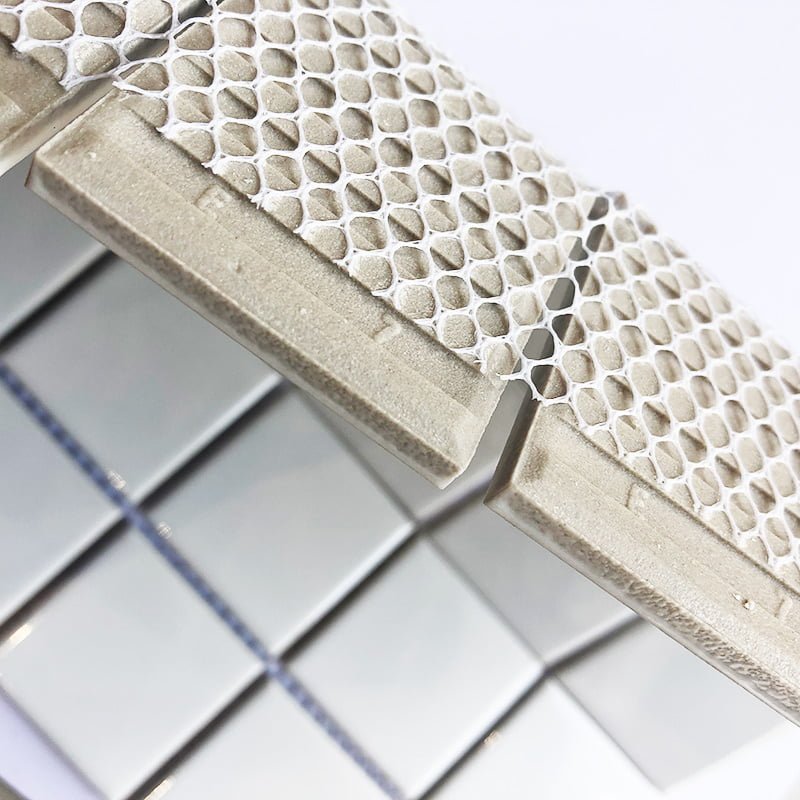
grootte:25x26mm; Length300 x Diameter260mm;12.82piece=1sqm
dikte:6mm
Oppervlak behandeling: Glans
Kleur:wit,Swart, Gray
Agterkantproses:Netwerk
toepassing toneel:badkamer, stort, kombuis, restaurant, mure, floor...
produksie tyd: dit sal 'n rukkie neem om te produseer (ongeveer. 1-2 weke) .
Handwerk tipe: Home improvement, Mosaic making
pakket:20stuk / karton;1.56m2 / karton;
Binnelandse verpakkingskarton,Die buitenste verpakking is van houtpallette, en die houtpallette word afsonderlik gelaai.
betalings metode:T / T; Westerse Unie; PayPal,ens.
Gestuur
Gestuur koste sal bepaal word deur die grootte, tipe, en plek.
ons voordeel:
Waterdig
Anti-slip
Fire prevention
Clients'case:


Verwante Produkte:

Vrae:
How much is your tile for Hexagon Mosaic Tiles - Wit Swart Keramiek Mosaic?
Ons teëls wissel in koste per vierkante voet, afhangende van die patroon en hoeveelheid wat u bestel. As u deur ons teëlprodukte blaai, kleinhandelpryse word vir elke patroon in die versamelings gepubliseer.
Can I have samples of your tile for Hexagon Mosaic Tiles - Wit Swart Keramiek Mosaic?
Jy kan. Monster pakke is beskikbaar vir die aankoop , or you can purchase an individual sample by visiting any tile page.
installasie & Care
How is the tile laid out? How will it arrive?
This all depends on your project. Generally we glue and lay out mosaics on mesh, which we then cut down and provide instruction so you can install them easily.(if it's custom). We also have collections that mould mounted for your reference. All of your tile will be packed in boxes securely and arrive to your place without any damage.
How do I install the tile for Hexagon Mosaic Tiles - Wit Swart Keramiek Mosaic?
1.Lay out the location of the backsplash on the wall.
2.Apply thin-set adhesive to the wall using a notched trowel.
3.Position the sheet on the wall, and press it into the wet thin-set adhesive.
4.Use a utility knife to cut through the mesh on the sheet of tile around the outlet.
5.Cut the tile to size using a special tile saw that available for rent at tool centers.
6.Allow the thin-set adhesive to dry overnight.
7.Remove any protruding thin-set from the tile joints with a flat-head screwdriver.
8.Dampen the surface of the tile with water on a sponge before applying grout.
9.Use a rubber float to apply the grout to the tile joints, pressing the grout into the tile at a 45° angle.
10.When the grout starts to set, go over the tile surface several times with a sponge dampened with water to wipe off any excess grout.
11.After the grout has dried, use a soft cloth to remove any grout haze from the surface.